Growing your own ginger at home is no longer limited to large gardens or seasonal farming. With the plastic container ginger method, anyone can enjoy fresh, organic ginger throughout the year—right from a balcony, terrace, or small backyard. This simple technique uses recycled plastic containers, minimal space, and basic care to deliver continuous harvests in all seasons.
In this article, you will learn how to grow ginger in plastic containers, why this method works so well, and how you can maintain healthy plants for long-term productivity.
Why Grow Ginger in Plastic Containers?
Plastic containers offer an ideal environment for ginger cultivation, especially for home gardeners. They are lightweight, affordable, and easy to move according to sunlight and weather conditions.
Here are some key benefits:
First, plastic containers retain moisture better than clay pots, which is essential for ginger’s shallow root system. Second, they warm up faster, helping ginger grow well even in cooler seasons. Third, recycled containers reduce waste and promote eco-friendly gardening.
Most importantly, container gardening allows you to control soil quality, drainage, and pests—three major factors in ginger success.
Understanding Ginger’s Growing Needs
Before planting, it is important to understand how ginger grows.
Ginger is a tropical plant that grows from underground rhizomes. It prefers warm temperatures, loose soil, and consistent moisture. Unlike many vegetables, ginger does not require deep soil but spreads horizontally.
It thrives best in:
- Temperature between 20°C and 35°C
- Partial sunlight (4–6 hours daily)
- Rich, well-draining soil
- High humidity
- Regular watering
By meeting these basic requirements, you can easily grow ginger year-round in containers.
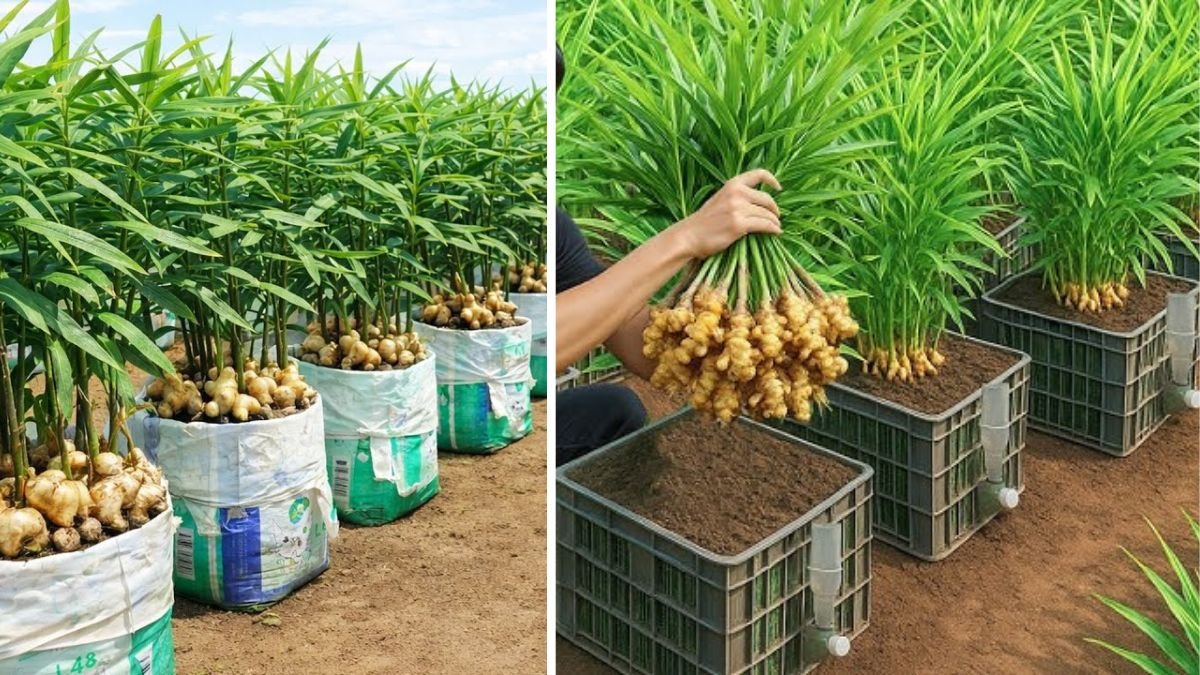
Choosing the Right Plastic Container
Selecting the right container is the foundation of success.
Choose a wide, shallow plastic container rather than a deep one. Ginger spreads sideways, so width matters more than depth.
Ideal container size:
- Width: At least 30–40 cm
- Depth: 20–25 cm
- With multiple drainage holes
You can use old buckets, storage boxes, paint tubs, or water containers—just make sure they are clean and have drainage holes at the bottom.
If holes are not present, create 6–8 small holes using a heated nail or drill.
Preparing the Perfect Soil Mix
Healthy soil ensures strong ginger growth.
Avoid using plain garden soil alone, as it can become compacted in containers. Instead, prepare a loose and nutrient-rich mix.
Recommended soil mixture:
- 40% garden soil
- 30% compost or vermicompost
- 20% coco peat or peat moss
- 10% sand or perlite
This mixture ensures proper drainage, aeration, and long-lasting fertility.
Before filling the container, add a thin layer of gravel or broken bricks at the bottom to improve drainage.
Selecting Quality Ginger Rhizomes
Choose fresh, healthy ginger pieces from a trusted source or market.
Look for rhizomes that are:
- Firm and plump
- Free from mold or rot
- With visible “eyes” or buds
- Light brown and smooth
Avoid shriveled, soft, or chemically treated ginger.
If your ginger does not have visible buds, soak it in water overnight and place it in a warm area for a few days until sprouts appear.
Planting Ginger in Plastic Containers
Follow these steps for proper planting:
First, cut large ginger rhizomes into 4–5 cm pieces, making sure each piece has at least one growing bud.
Let the cut pieces dry in shade for 24 hours. This prevents fungal infections.
Fill your container with soil mix up to 80% height.
Place the ginger pieces horizontally with buds facing upward.
Cover lightly with 3–5 cm of soil. Do not bury them too deep.
Water gently until the soil becomes moist, not soggy.
Keep the container in a warm, shaded place for the first two weeks.
Within 10–20 days, green shoots will start appearing.
Sunlight and Temperature Management
Ginger prefers indirect sunlight.
Place containers where they receive morning sun and afternoon shade. Excessive sunlight can dry the soil and burn leaves.
In summer, move containers to partially shaded areas. In winter, place them near sunny windows or balconies.
If temperatures drop below 15°C, protect plants with plastic covers or keep them indoors.
This flexibility is one major advantage of container gardening.
Watering Schedule for Year-Round Growth
Water management is crucial.
Ginger likes moist soil but hates waterlogging.
General watering guide:
- Summer: Every 2–3 days
- Monsoon: When soil feels dry
- Winter: Once or twice a week
Always check the topsoil before watering. If it feels dry, water gently.
Avoid pouring water directly on shoots. Instead, water around the base.
Organic Fertilization for Continuous Harvest
To produce ginger all year, regular feeding is necessary.
Use organic fertilizers every 15–20 days.
Best natural fertilizers include:
- Vermicompost
- Cow dung compost
- Banana peel water
- Mustard cake solution
- Seaweed extract
Apply fertilizer around the plant base and lightly mix into soil.
Avoid chemical fertilizers, as they reduce flavor and harm soil microbes.
Mulching for Moisture and Protection
Mulching is highly beneficial in container ginger farming.
Cover the soil surface with dry leaves, straw, coconut husk, or grass.
Mulch helps by:
- Retaining moisture
- Preventing weeds
- Regulating soil temperature
- Improving soil fertility
Replace mulch every month for best results.
Pest and Disease Prevention
Ginger grown in containers faces fewer pests, but some problems may occur.
Common issues include aphids, root rot, and fungal infections.
Prevention methods:
- Spray neem oil every 15 days
- Ensure good drainage
- Avoid overcrowding
- Remove infected leaves immediately
For fungal problems, sprinkle wood ash or cinnamon powder on soil.
Regular inspection keeps plants healthy.
How to Harvest Ginger Continuously
One of the biggest advantages of this method is partial harvesting.
You do not need to uproot the entire plant.
After 4–5 months, gently dig from the side of the container.
Remove mature rhizomes while keeping younger parts intact.
Cover exposed roots with fresh soil.
This allows the plant to continue growing and producing.
For full harvest, wait 8–10 months when leaves turn yellow.
Storing and Replanting Ginger
After harvesting, wash ginger and dry in shade.
Store in a cool, dry place or refrigerate.
Select the healthiest pieces for replanting.
With this cycle, you can maintain endless ginger production year after year.
Common Mistakes to Avoid
Many beginners fail due to simple mistakes.
Avoid these errors:
- Using deep narrow pots
- Overwatering
- Poor drainage
- Low-quality seed ginger
- Excessive sunlight
- Skipping fertilization
Correcting these ensures high yield and healthy plants.
Benefits of Growing Ginger at Home
Homegrown ginger offers many advantages:
- Chemical-free and organic
- Strong aroma and flavor
- Cost-effective
- Always fresh
- Supports sustainable living
It also reduces dependence on market produce and promotes healthy eating.
Conclusion
The plastic container ginger method is a simple, affordable, and highly productive way to grow ginger throughout the year. With basic materials, proper soil, regular care, and smart harvesting, you can enjoy continuous ginger supply even in limited spaces.
Whether you live in an apartment or a house, this method empowers you to become self-sufficient in growing one of the most valuable kitchen spices.
Start today with a recycled plastic container, and transform your home into a mini ginger farm that produces fresh harvests all year long.