Introduction: Grow Your Own Bean Sprouts Easily
Bean sprouts are a highly nutritious and versatile ingredient, packed with vitamins, minerals, and fiber. They can elevate salads, stir-fries, sandwiches, and soups. While store-bought sprouts are convenient, growing your own at home ensures freshness, cost savings, and complete control over safety.
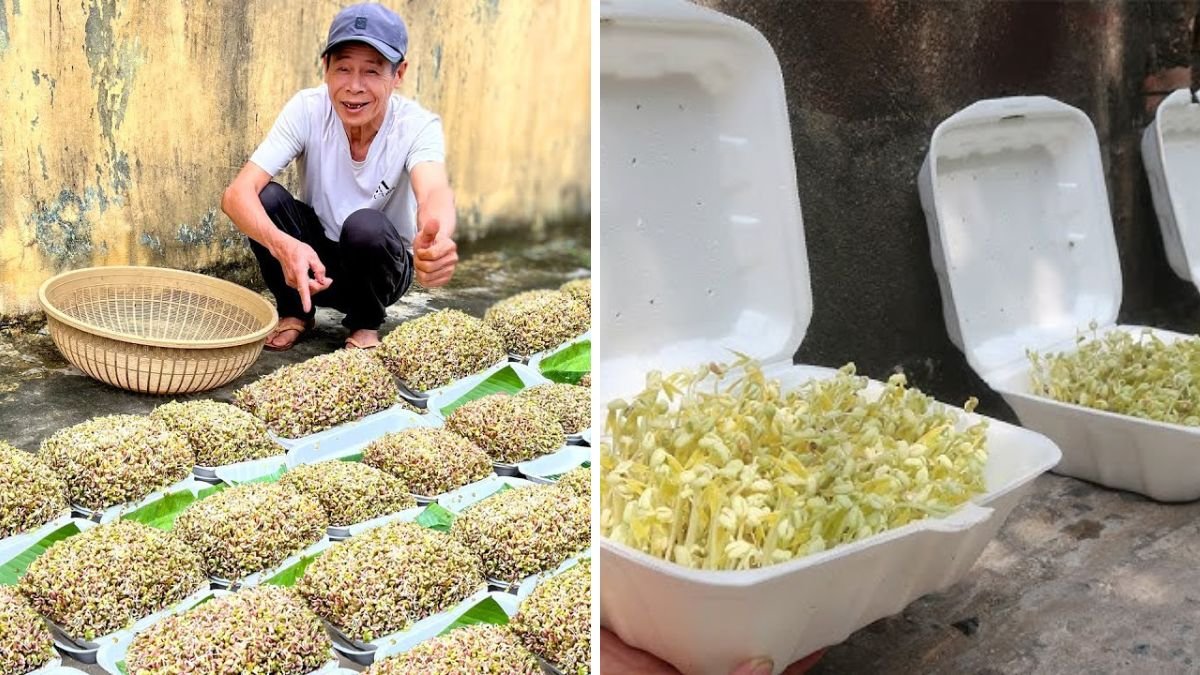
Traditionally, sprouting might seem complicated or messy. But recent innovations in home gardening show that growing plump bean sprouts in a simple foam box is fast, cheap, and safe. Gardeners and DIY enthusiasts are increasingly using foam boxes as a reliable method to produce high-quality sprouts without soil or expensive equipment. The simplicity and efficiency of this method make it accessible to beginners and urban gardeners alike.
Why Foam Boxes Work Best
Foam boxes, such as styrofoam containers or coolers, provide an excellent environment for sprouting beans. They are lightweight, insulating, and easy to modify with drainage holes. Here’s why they’re ideal:
- Temperature Control: Foam retains warmth, which encourages uniform germination.
- Space Efficiency: Large trays inside foam boxes allow beans to spread out evenly.
- Low Cost: Foam boxes are inexpensive, reusable, and often available as repurposed packaging.
Before starting, ensure the foam box is clean and free from chemicals to avoid contaminating your sprouts. This basic precaution is essential for safe and healthy growth.
Step 1: Selecting the Right Beans
Mung beans are the most commonly used beans for sprouting due to their quick germination and crisp texture. You can also experiment with lentils, chickpeas, or soybeans.
Choose high-quality, clean seeds from reliable sources. Before soaking, rinse them thoroughly under running water to remove dust, dirt, or potential pesticide residues. Using clean, fresh seeds is crucial to produce plump, healthy sprouts.
Step 2: Soaking Your Beans
Soaking is the first active step in sprouting. Place your beans in a bowl of clean, potable water for 8–12 hours, or overnight.
This process softens the seed coat and triggers germination. For faster and more consistent results, use filtered water if your tap water has high chlorine content.
After soaking, drain the water completely and prepare to transfer the beans to your foam box.
Step 3: Preparing the Foam Box
Proper preparation of the foam box is key to successful sprouting:
- Drainage: Drill several small holes in the bottom so excess water can escape. This prevents standing water, which can lead to bacterial growth.
- Layering: Line the bottom of the box with a clean, damp cloth or paper towel. This helps distribute moisture evenly and prevents beans from sticking.
- Spreading: Spread soaked beans in a thin, even layer. Overcrowding can reduce air circulation and hinder growth, leading to smaller or uneven sprouts.
Using a foam box allows for excellent airflow, consistent moisture, and temperature control, all of which are essential for plump sprouts.
Step 4: Rinsing and Draining
Rinse your sprouts at least twice daily, preferably in the morning and evening, with clean potable water. After each rinse, drain thoroughly.
Proper rinsing prevents slime, mold, and unpleasant odors while ensuring the sprouts remain crisp. Avoid leaving water pooled at the bottom, as stagnant water can promote bacterial contamination.
Regular rinsing also encourages uniform growth, resulting in fuller, plumper sprouts ready for harvest in just a few days.
Step 5: Controlling Light and Temperature
Bean sprouts do not require sunlight during early growth. In fact, too much direct light can turn them green and slightly bitter.
Place your foam box in a cool, shaded area where the temperature is moderate. This ensures the sprouts remain tender, crisp, and visually appealing.
Indirect light or ambient room light is sufficient. Maintaining consistent temperature and moisture levels accelerates growth and improves texture.
Step 6: Harvesting Your Bean Sprouts
Sprouts typically reach optimal size in 3–5 days, depending on temperature and moisture. You’ll know they are ready when stems are thick, white, and slightly crunchy.
Harvest by gently removing the sprouts with clean hands or scissors. Avoid pulling them forcefully, which can damage roots or remaining beans.
Once harvested, rinse thoroughly and allow them to drain. They can be stored in a breathable container in the refrigerator for 2–4 days, but they are freshest when consumed immediately.
Step 7: Safety and Hygiene Tips
Because sprouts grow in a warm, damp environment, proper hygiene is crucial to avoid bacterial contamination:
- Wash your hands thoroughly before handling sprouts.
- Sterilize the foam box and any tools with warm soapy water.
- Always use clean, potable water for rinsing.
- Ensure excellent drainage to prevent standing water.
- Consume sprouts within a few days of harvest for best freshness.
Following these precautions ensures your homegrown bean sprouts are both safe and delicious.
Bonus Tips for Plumper, Crunchier Sprouts
- Avoid overcrowding: Spread beans evenly for better air circulation.
- Use filtered water: Improves taste and texture.
- Harvest before excessive light exposure: Keeps sprouts white and crisp.
- Rotate or gently stir beans: Ensures even growth and prevents tangling.
- Adjust soaking time: Longer soaking can produce slightly larger sprouts but monitor to prevent fermentation.
By combining these techniques, you can produce consistently plump, crunchy, and flavorful sprouts.
Background Context: Why Home Sprouting Is Popular
Home sprouting is becoming increasingly popular due to several advantages:
- Cost Efficiency: Growing beans at home is cheaper than buying pre-packaged sprouts.
- Health Benefits: Fresh sprouts are nutrient-rich, with high fiber, vitamins, and plant-based proteins.
- Sustainability: Producing your own sprouts reduces packaging waste and carbon footprint.
Using a foam box makes home sprouting particularly beginner-friendly, simple, and scalable. Whether for personal use or small-scale household production, this method is convenient and highly rewarding.
Suggested Authoritative Sources
- University Extension Sprouting Guides – Detailed, science-based safety and germination methods.
- FDA / CDC Sprouting Recommendations – For hygiene and bacterial safety guidelines.
- Homes & Gardens – Step-by-step home sprouting techniques. (homesandgardens.com)
- Microgreen & Urban Gardening Blogs – Practical advice for indoor sprouting systems. (microgreen-shop.com)
- Scientific Studies on Seed Germination – For advanced sprouting methods, including UV treatment and controlled environment techniques.
Conclusion
Growing plump bean sprouts in a foam box is an easy, affordable, and safe method for anyone looking to enjoy fresh sprouts at home. With the right seeds, proper soaking, clean foam boxes, consistent rinsing, and careful attention to light and temperature, you can harvest delicious sprouts in just 3–5 days.
Not only are homegrown sprouts more nutritious and flavorful, but this method also reduces costs, minimizes waste, and gives you complete control over safety.
Whether you’re a beginner gardener or a health-conscious DIY enthusiast, following these steps will make sprouting simple, fun, and highly rewarding. Start today, and enjoy crunchy, plump bean sprouts straight from your own kitchen!