Introduction
Imagine harvesting fresh, crunchy peanuts right from your backyard or patio. Peanuts, often mistaken for nuts, are actually legumes closely related to beans and peas. Unlike tree nuts, they grow underground, making their cultivation surprisingly unique and rewarding. While most people associate peanut farming with large commercial operations in warm southern climates, modern gardening shows that growing peanuts at home is achievable, even for beginners, when you know the right secrets.
Homegrown peanuts — particularly heirloom or “queen” varieties — provide fresh flavor, nutritional benefits, and a sense of accomplishment. Whether for roasting, snacking, or homemade peanut butter, cultivating peanuts can be both fun and educational. In this guide, we will explore Revealing Secret Growing Queen Peanuts At Home, Didn’t Expec, showing step-by-step techniques, expert tips, and little-known tricks to ensure success.
Why Grow Peanuts at Home?
Growing peanuts at home is not only rewarding but also offers several benefits:
- Soil enrichment: Peanuts fix nitrogen, improving soil fertility for other crops.
- Fresh harvests: Homegrown peanuts have a richer flavor than store-bought varieties.
- Educational: A fascinating plant for children and beginner gardeners.
- Flexible cultivation: Can be grown in gardens, raised beds, or large containers.
With loose, well-draining soil and adequate sunlight, peanuts thrive in various environments. Even if you live in a cooler climate, indoor starting or container planting allows you to enjoy this unusual crop.
Choosing the Best Peanut Variety
Not all peanuts are equally suited for home gardens. Selecting the right variety is key to success:
- Runner peanuts: Versatile, productive, and ideal for backyard planting.
- Spanish peanuts: Smaller, oil-rich, excellent for roasting and baking.
- Valencia peanuts: Sweet and ideal for boiling or fresh snacking.
Important: Only plant raw, unroasted, unsalted peanuts. Roasted or salted varieties will not germinate. Using certified peanut seeds or organic raw peanuts ensures better germination rates.
Secret Steps to Growing Queen Peanuts
Growing peanuts successfully involves several key steps that many gardeners overlook. Here’s the secret roadmap:
1. Timing Is Everything
Peanuts need warm soil to germinate — ideally above 65°F (18°C). Plant them after the last frost in spring. In cooler areas, start seeds indoors 4–6 weeks before transplanting outdoors. Early planting gives your plants a head start and increases yields.
2. Location and Soil
Peanuts require full sun — at least 6–8 hours daily. They thrive in loose, sandy soil that allows the pegs (stems that form pods) to penetrate easily. Heavy clay soils inhibit growth and reduce harvests. Raised beds or containers with well-draining mixes are perfect alternatives if your garden soil is dense.
3. Planting Your Seeds
- Sow seeds 1–2 inches deep.
- Space seeds 6–8 inches apart in rows 18–24 inches apart.
- Containers should be 12–15 inches deep for sufficient root growth.
Planting with proper spacing ensures healthy development and reduces competition between plants.
4. Watering
Peanuts prefer consistent moisture but dislike soggy soil. About 1 inch of water per week is sufficient once plants are established. Too much water leads to rot, while too little prevents pod formation. Regular observation is key — keep soil slightly damp, not saturated.
5. Mounding Soil Around Plants
Once flowers appear and fade, gently mound soil around the base of the plants. This is a crucial step — the pegs grow downward into the soil to form pods, and loose soil encourages this process. Many gardeners underestimate this technique, yet it significantly impacts pod quantity and quality.
6. Mulching and Weed Control
Apply mulch to conserve moisture and suppress weeds. Peanuts are sensitive to competition, and keeping the area around them weed-free helps the plants focus energy on nut production. Organic mulch like straw or shredded leaves works well.
Container and Indoor Growing
Even without a garden, you can grow peanuts using containers or raised beds:
- Large containers or grow bags: Minimum 12 inches deep, with good drainage.
- Raised beds: Sandy soil mix encourages peg development.
- Indoor or greenhouse setups: Extend the growing season in cooler climates.
These methods allow urban or balcony gardeners to successfully cultivate peanuts, a surprising advantage for many first-time growers.
Harvesting Queen Peanuts
Peanuts typically take 100–150 days to mature. Signs of readiness include:
- Leaves turning yellow
- Plants slowing growth
To harvest:
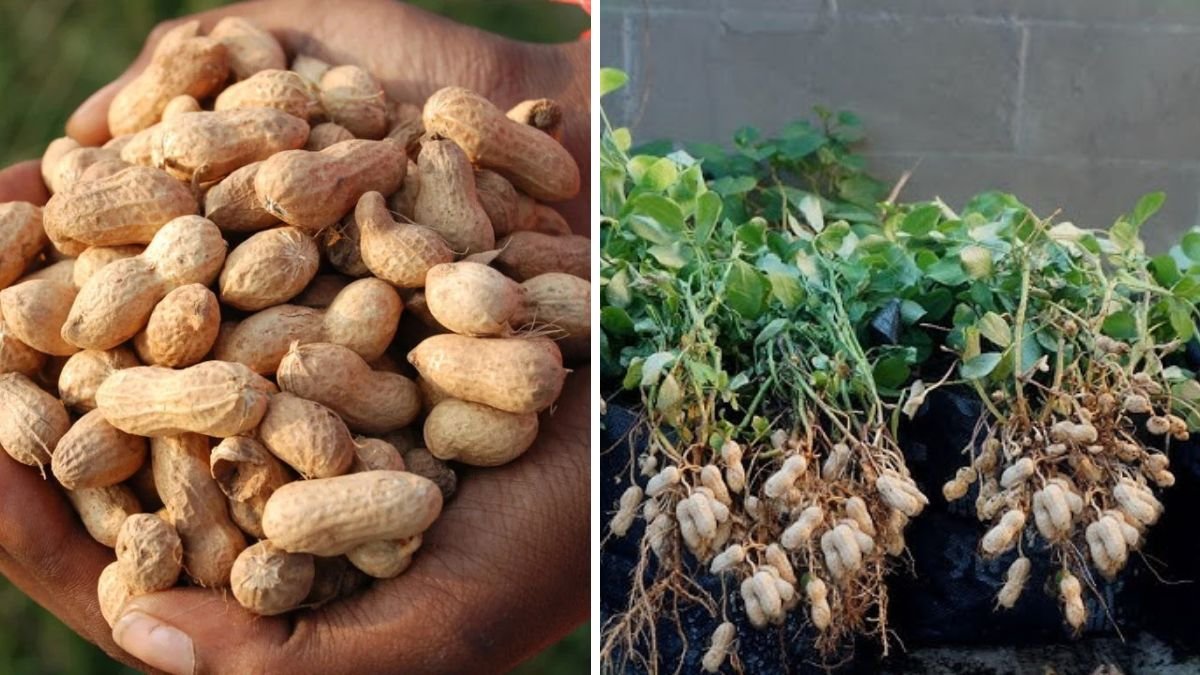
- Loosen soil carefully with a garden fork.
- Pull up the entire plant, as peanuts grow beneath the roots.
- Shake off excess soil and let pods dry in a warm, ventilated area for 1–2 weeks.
Proper curing improves flavor and extends storage life.
Tips You Probably Didn’t Expect
Seasoned peanut growers share a few lesser-known techniques:
- Start seeds indoors: Helps in cooler regions.
- Avoid heavy clay soil: Loosen soil with sand or compost.
- Stop watering before harvest: Reduces mold risk.
- Ensure deep root space in containers: Vital for proper pod development.
These tips often surprise first-time gardeners and can make the difference between a modest harvest and an abundant one.
Common Mistakes to Avoid
Even experienced gardeners can make errors that affect peanut growth:
- Planting roasted or salted peanuts
- Planting in cold soil
- Overwatering or allowing standing water
- Crowding plants too closely, reducing airflow
Avoiding these mistakes ensures a healthy, high-yielding crop.
Suggested Authoritative Sources
For further learning and expert advice, consult:
- Almanac’s Peanut Growing Guide: Step-by-step planting, care, and harvest tips (almanac.com)
- PlantNative Peanut Guide: Insights for container and outdoor cultivation (plantnative.org)
- Agribuzz Gardening Tips: Variety selection and care routines (agribuzz.org)
- National Peanut Board: Harvesting and post-harvest care (nationalpeanutboard.org)
These resources provide science-backed guidance and regional advice for home peanut growers.
Final Thoughts
Growing queen peanuts at home is an unexpected delight for gardeners. With simple techniques, proper planning, and a few secrets — like mounding soil and using containers — even beginners can harvest their own fresh peanuts.
From planting raw seeds to harvesting cured pods, homegrown peanuts are rewarding, nutritious, and surprisingly easy when done correctly. Whether you have a backyard, balcony, or container garden, following these steps ensures a successful peanut-growing experience.
Embrace the joy of watching tiny seeds grow into delicious legumes, and enjoy the satisfaction of digging up your very own homegrown peanuts — a treat many gardeners didn’t expect!