Introduction
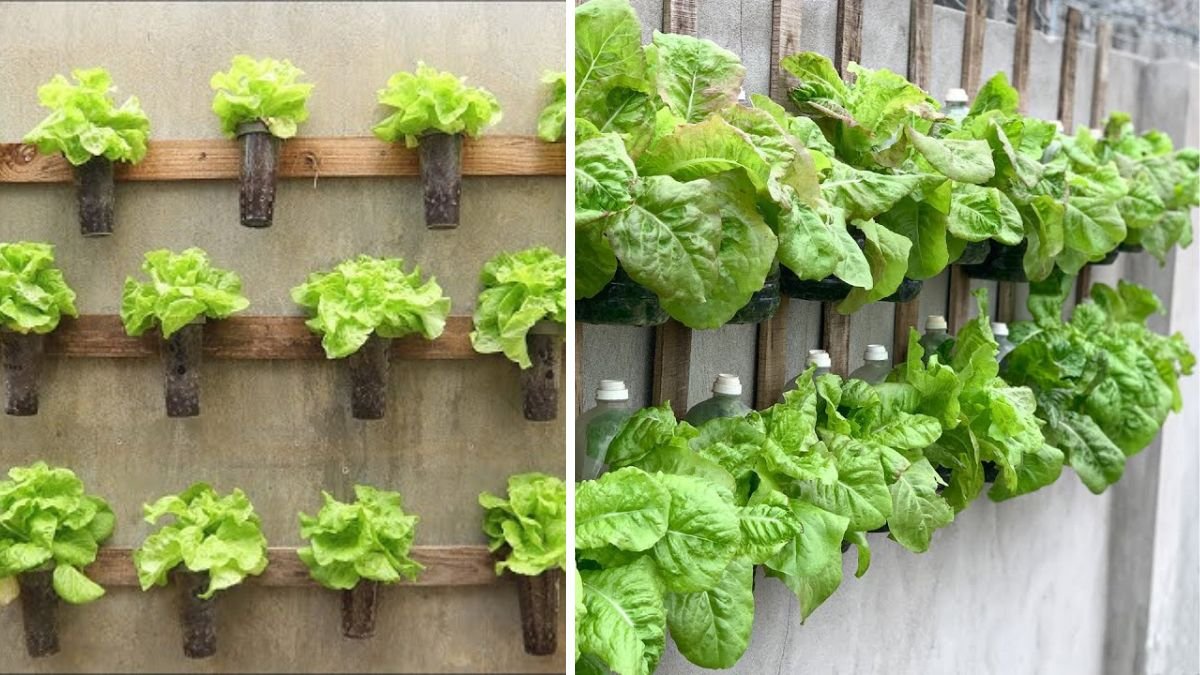
Plastic waste is a global challenge, and with millions of disposable cups used annually, upcycling them into a hanging vegetable garden is an innovative, eco-friendly solution. This DIY approach not only reduces waste but also creates an efficient, space-saving way to grow vegetables at home. Whether you live in an apartment, have a small backyard, or want a balcony garden, recycling plastic cups can turn ordinary waste into a productive vertical garden.
Repurposing plastic cups aligns with the latest sustainable gardening trends. Gardeners and urban dwellers are increasingly looking for ways to grow fresh produce without relying on large plots of land. Hanging cup gardens provide fresh herbs, leafy greens, and even small vegetables, offering both aesthetic and practical benefits. (creativegreenliving.com)
Why Recycle Plastic Cups into Hanging Gardens
🌍 Eco-Friendly Gardening
Repurposing plastic cups keeps them out of landfills and oceans, promoting environmental sustainability. Using waste to grow food reduces your ecological footprint while demonstrating a creative approach to recycling.
🏡 Ideal for Small Spaces
Balconies, patios, and tiny yards can be transformed into lush gardens using vertical hanging systems. Cups can be stacked or arranged in tiers, maximizing space and allowing urban gardeners to enjoy greenery. (thenational.com.pg)
🌿 Cost-Effective Gardening
DIY hanging gardens are inexpensive compared to traditional planters or hydroponic systems. Everyday plastic cups, string, and potting soil are enough to start growing fresh vegetables, herbs, or microgreens.
Materials Needed
To start your hanging vegetable garden, gather:
- Clean plastic cups (solo cups or disposable cups)
- Potting soil suitable for vegetables
- Vegetable seeds or seedlings (herbs, lettuce, cherry tomatoes, peppers)
- Rope, string, or twine for hanging
- Small rocks or pebbles for drainage
- Drill or sharp object for making holes
Tip: Ensure drainage holes at the bottom of each cup to prevent waterlogging.
Step-by-Step Guide
1. Prepare the Cups
Wash and dry the cups thoroughly. Poke 2–3 small drainage holes at the bottom using a drill or sharp tool. Thin cups may need reinforcement with tape to prevent cracking.
2. Add Drainage and Soil
Place small rocks or pebbles at the bottom of each cup for proper drainage. Fill with potting mix, leaving about an inch from the rim to avoid soil spillage.
3. Plant Your Vegetables
Plant seeds or seedlings gently in the soil. Herbs like basil, mint, and parsley, as well as leafy greens like lettuce and spinach, grow well in small containers. Cherry tomatoes or peppers are also suitable for cups with adequate sunlight. (thenational.com.pg)
4. Attach Hanging Strings
Tie strings or twine around the cups’ rims or through holes made near the top. Ensure the knots are secure to support the weight of multiple cups if stacking them vertically.
5. Hang in a Sunny Spot
Place the cups where they can receive at least 6–8 hours of sunlight daily. Balcony railings, fences, or overhead beams are ideal.
6. Maintain Your Garden
Water consistently but avoid overwatering. Container gardens dry faster than traditional garden beds. Apply organic liquid fertilizer or compost occasionally to ensure healthy growth.
Best Plants for Hanging Cup Gardens
Some plants are particularly suited for small container gardening:
- Herbs: Basil, Mint, Parsley, Oregano
- Leafy Greens: Lettuce, Spinach, Arugula
- Small Vegetables: Cherry Tomatoes, Peppers
- Microgreens: Radish, Mustard, Kale
These plants thrive in containers, require minimal soil depth, and can flourish in vertical setups. (thenational.com.pg)
Tips for Success
- Balance Weight: Don’t overcrowd cups to prevent strain on strings.
- Sunlight Exposure: Place your hanging garden on a south- or west-facing wall for optimal growth.
- Quality Soil: Use good potting soil to provide nutrients for root development.
- Rotate Cups: Rotate cups occasionally to ensure even sunlight distribution.
Creative Variations
Multi-Tier Hanging Garden
Arrange cups in multiple tiers for a cascading visual effect, creating a mini vertical farm.
Painted Cup Garden
Decorate cups with waterproof paint to add style, personality, and color to your garden setup.
Vertical Cup Columns
Stack cups vertically to make compact columns, perfect for balconies or small patios.
Benefits of Hanging Cup Gardens
- Sustainable Gardening: Reduces plastic waste while promoting urban agriculture.
- Space-Saving: Maximizes use of limited outdoor areas.
- Affordable: Minimal investment for fresh homegrown produce.
- Educational: Great for teaching children about recycling and gardening.
Suggested Authoritative Sources
- The Better India – Upcycling Initiatives: Inspiring large-scale recycled plastic gardens. (thebetterindia.com)
- Creative Green Living: Practical ideas for turning plastic bottles into vertical gardens. (creativegreenliving.com)
- Gardening Know How – Reuse Plastic in Your Garden: Sustainable gardening tips using everyday plastics. (gardeningknowhow.com)
These sites offer detailed guidance, tutorials, and expert tips on DIY upcycling for gardening.
Conclusion
Recycling plastic cups into a hanging vegetable garden is an innovative, eco-friendly, and practical project for any home gardener. It reduces waste, saves space, and allows you to grow fresh produce even in small urban settings. With simple materials, creativity, and a little care, you can transform ordinary plastic cups into a thriving vertical garden.
Whether for personal use or community projects, this DIY method demonstrates how sustainability and gardening can work hand-in-hand, turning waste into a source of beauty, nutrition, and inspiration. 🌱