Introduction: Why Spurge Weed Is a Homeowner’s Nightmare
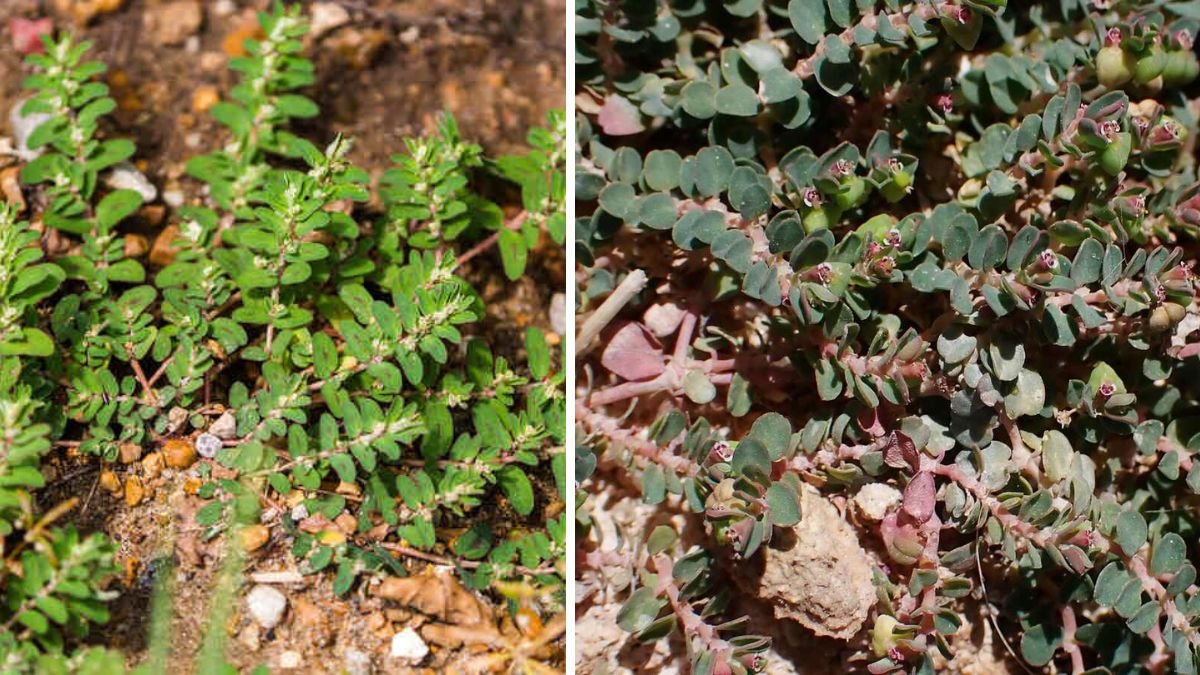
Invasive spurge weeds are some of the most persistent and frustrating pests in lawns, gardens, and landscapes. With fast-growing stems, low mats, and prolific seed production, species like spotted spurge (Euphorbia maculata) and prostrate spurge can take over a yard if left unchecked. Even small patches, if ignored, can multiply quickly, spreading seeds that survive in soil for years.
Despite being common, many gardeners make preventable mistakes when trying to control spurge, inadvertently making the problem worse. From improper timing to using ineffective tools or products, these errors cost time, effort, and sometimes money. In this guide, we’ll cover the 10 mistakes everyone makes when dealing with invasive spurge weed and provide actionable solutions to help you tackle this resilient invader with confidence using [FOCUS KEYWORD].
Mistake 1: Waiting Too Long to Act
One of the most common errors is ignoring spurge until it has already formed dense mats across lawns or garden beds. While individual plants may seem harmless at first, they reproduce rapidly. A single mature spurge plant can release thousands of seeds in one season, making later removal exponentially harder.
Solution: Inspect your lawn and garden weekly during spring and early summer. Remove seedlings as soon as you notice them. Early intervention prevents large infestations and reduces the effort required later. (positivebloom.com)
Mistake 2: Pulling Without Removing the Entire Root
Pulling weeds without removing the roots is a futile exercise. Spurge has a deep taproot, and even small root fragments left behind can sprout new plants. Many gardeners unknowingly leave part of the root system intact, allowing the weed to regenerate quickly.
Solution: Use a weeding fork or a specialized tool to loosen the soil around the base. Remove the plant along with its entire root system, preferably when the soil is slightly moist to prevent breakage. (housedigest.com)
Mistake 3: Pulling in Dry or Wet Conditions
Soil moisture matters when hand-pulling spurge. Attempting removal in extremely dry soil often breaks the roots, while saturated soil makes it hard to grasp the plant base. Both scenarios reduce your chances of successful eradication.
Solution: Aim to weed a day or two after rainfall, when soil is moist but not waterlogged. This allows for easier root extraction and minimizes regrowth. (housedigest.com)
Mistake 4: Raking or Tilling Soil Prematurely
Raking or tilling soil before removing spurge might seem helpful, but it often brings dormant seeds to the surface, encouraging germination. This counterproductive step can make the weed problem worse over time.
Solution: Delay raking until after thorough weed removal or apply mulch directly over weed-free soil to suppress seed germination. Mulch also helps retain moisture and prevents new spurge seedlings from establishing. (housedigest.com)
Mistake 5: Applying Pre-Emergent Herbicides at the Wrong Time
Timing is critical when using pre-emergent herbicides. Applying them after spurge seeds have already germinated is largely ineffective. Many gardeners mistakenly apply these chemicals reactively rather than proactively.
Solution: Apply pre-emergent herbicides in early spring, before soil temperatures rise and spurge seeds start to germinate. This creates a barrier that prevents seedlings from emerging, reducing future infestations. (housedigest.com)
Mistake 6: Relying on Vinegar for Mature Spurge
Home remedies, like vinegar sprays, are popular for weed control but are typically effective only on young seedlings. Mature spurge plants often survive these treatments, leaving gardeners frustrated when the weed regrows.
Solution: For established spurge, use a post-emergent herbicide specifically labeled for spurge. Products containing triclopyr, 2,4-D, or dicamba are generally effective on broadleaf weeds like spurge. (positivebloom.com)
Mistake 7: Neglecting Mulch in Garden Beds
Bare soil provides an ideal environment for spurge seeds to germinate. Without mulch, sunlight reaches the soil surface, stimulating weed growth and allowing seedlings to establish quickly.
Solution: Apply 2–3 inches of organic mulch, straw, or compost over garden beds. Mulch blocks light, reduces seed germination, and helps retain soil moisture, giving desirable plants a competitive advantage. (ipm.ucanr.edu)
Mistake 8: Handling Spurge Without Protective Gear
Spurge exudes milky sap that can irritate skin or cause rashes. Many gardeners make the mistake of pulling or handling the plant bare-handed, risking discomfort or injury.
Solution: Wear waterproof gloves, long sleeves, and eye protection when removing spurge. Wash hands and tools thoroughly afterward to prevent irritation. (positivebloom.com)
Mistake 9: Using the Wrong Herbicides
Not all herbicides work equally on spurge. Some only burn the leaves temporarily, allowing the plant to recover quickly. Using the wrong product is not only ineffective but can encourage more vigorous growth.
Solution: Choose herbicides labeled for broadleaf weeds and spurge specifically. Follow instructions carefully and consider targeted spot treatments for small infestations. (positivebloom.com)
Mistake 10: Allowing Herbicide Drift to Damage Desirable Plants
Applying herbicides carelessly can lead to drift, damaging nearby desirable plants. Many gardeners make the mistake of spraying on windy days or without proper shielding, unintentionally harming flowers, shrubs, or turf.
Solution: Apply herbicides on calm days and use protective barriers to prevent drift. This preserves healthy plants while targeting spurge effectively. (housedigest.com)
Bonus Mistake: Improper Weed Disposal
Even after successfully removing spurge, improper disposal can lead to reinfestation. Spurge seeds and roots can remain viable if composted or discarded carelessly.
Solution: Bag removed weeds in thick trash bags, sun-dry them if possible, and dispose of them properly. Never compost spurge or dump it where seeds could germinate again. (housedigest.com)
Expert Tips for Long-Term Control
- Regular monitoring: Inspect your lawn frequently, especially after rain, to catch new sprouts early. (positivebloom.com)
- Healthy lawn practices: Maintain thick, healthy turf with proper fertilization, mowing, and watering to outcompete spurge. (sodsolutions.com)
- Aeration: Loosen compacted soil to improve turf growth and reduce areas where weeds establish.
- Avoid lawn scalping: Cutting grass too short creates bare spots that spurge thrives in.
Authoritative Sources
- Mistakes Everyone Makes When Dealing With Invasive Spurge Weed — House Digest (housedigest.com)
- 10 Mistakes to Avoid When Dealing With Spurge Weed — Positive Bloom (positivebloom.com)
- Spotted Spurge and Other Spurges — UC IPM (ipm.ucanr.edu)
- How to Control Spurge Weeds — Preen (preen.com)
Conclusion: Avoid Frustration, Take Smart Action
Invasive spurge weeds are tough, but most gardeners make mistakes that are entirely avoidable. From delayed action and improper pulling to herbicide misuse and unsafe handling, these errors allow spurge to persist and spread. By following these expert tips and using [FOCUS KEYWORD], you can tackle spurge effectively, protect your lawn and garden, and prevent future infestations.
With early intervention, proper technique, and ongoing maintenance, spurge can be controlled — leaving you with a healthier, weed-free garden that thrives season after season.