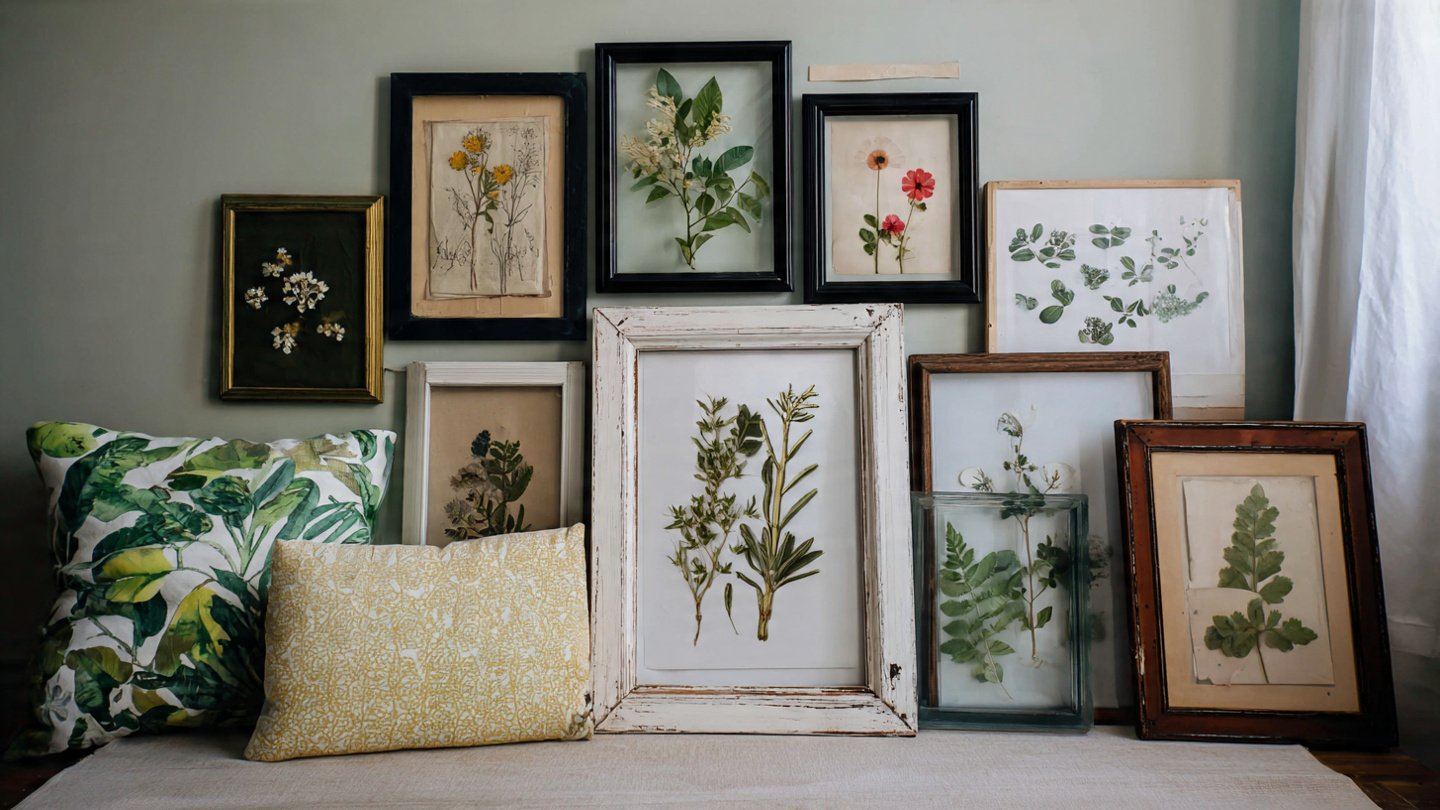
If you’re looking for a creative and sustainable way to enhance your home decor, repurposing old picture frames into a vibrant botanical gallery wall can be the perfect solution. Not only does this project allow you to showcase your personality and creativity, but it also adds a touch of natural beauty to your space. This article provides a comprehensive guide on how to transform your old picture frames into a stunning botanical gallery wall. Let’s dive in!
Step 1: Gather Your Materials
The first step in creating a botanical gallery wall is to gather your materials. This includes:
- Old Picture Frames: Find frames in various sizes and styles to add interest.
- Botanical Prints or Dried Plants: Choose images or real specimens that resonate with you.
- Backing Material: If your frames don’t have a backing, you might need cardboard, foam board, or wood.
- Mounting Supplies: Use double-sided tape, glue, or clips to secure your prints or plants.
- Tools: Gather essential tools such as scissors, a ruler, and perhaps a paintbrush if you choose to paint your frames.
Step 2: Choose Your Botanical Theme
Before you start assembling your wall, it helps to settle on a theme. A cohesive theme ensures that your gallery wall has a harmonious look. Here are a few ideas:
- Monochromatic Greens: Use various shades of green to create a serene and cohesive look.
- Color Pop: Incorporate colorful flowers or plants to create a vibrant display.
- Vintage Botanicals: Use antique-style prints or dried wildflowers for a nostalgic ambiance.
Deciding on a theme will guide your selection of images and plants, enhancing the overall aesthetic of your gallery wall.
Step 3: Prepare Your Frames
Next, prepare the frames for your new display. Clean each frame thoroughly and check for any damage. If desired, consider repainting or refinishing the frames to match your chosen theme:
- Paint: Select a color that enhances your botanical theme. Soft pastels work well for a delicate look, while bold colors can make a striking statement.
- Refinish: If you prefer a rustic look, sanding down the frames can give them a weathered appearance.
Allow any paint or finishes to dry completely before moving on to the next step.
Step 4: Select and Prepare Your Botanical Content
Whether you choose to use prints or dried plants, make sure they are prepared before framing. If using prints:
- Print Quality: Ensure that the prints are of high quality; you might consider printing on textured or high-quality paper.
- Cutting: Carefully cut the prints to fit your frames, leaving a small consistent border for a professional finish.
If using real plants:
- Dried Plants: Collect wildflowers, leaves, or herbs and dry them using a press or a desiccant.
- Placement: Think creatively about how to position the plants within the frame—horizontally, vertically, or overlapping.
Step 5: Assemble the Frames
Now that your frames and botanical content are ready, it’s time for assembly. Start by placing your botanical prints or dried plants into the frames. If using plants, you can attach them to the backing material using glue or double-sided tape. For prints:
- Insert the Print: Ensure it’s centered and aligned properly within the frame.
- Secure the Backing: Close the frame securely, so the contents are held in place.
Take your time during this step to avoid any mishaps that could ruin a frame.
Step 6: Plan the Layout of Your Gallery Wall
With your frames assembled, it’s time to visualize and arrange them on your wall. To do this effectively:
- Mock Layout: Use the floor to lay out your frames in different configurations before committing to the wall.
- Consider Balance: Balance different frame sizes and shapes for a visually appealing layout.
- Add Spacing: Leave equal space between frames for a curated look.
Taking the time to plan ensures a more cohesive gallery wall.
Step 7: Hang Your Frames
After you have decided on a layout, it’s time to hang your frames on the wall. Depending on the weight of your frames, you may want to use:
- Nails or Hooks: Ideal for heavier frames.
- Adhesive Strips: Useful for lighter frames and easy removal.
Be sure to use a level to keep your frames straight and aligned perfectly.
Conclusion
Creating a botanical gallery wall using old picture frames is an excellent way to make a personal statement in your home while celebrating nature. Whether you opt for prints or dried plants, the process allows for creativity and individual expression. By following the steps outlined in this guide, you will not only breathe new life into old frames but also create a stunning focal point in your decor. Remember, the most important aspect of a gallery wall is to reflect your personality and style—so have fun with it!
FAQs
Can I use real plants in my gallery wall?
Yes, you can use dried plants, leaves, or flowers, as long as they are properly dried and preserved.
How do I prevent the prints from fading over time?
To prevent fading, use archival quality frames and place your gallery wall away from direct sunlight.
What types of frames work best for this project?
Frames of all styles and sizes can work well, but consider using those with different textures and finishes to add visual interest.
How can I change the theme of my gallery wall later?
Simply replace the frames or the content inside them; it’s easy to refresh the look whenever you want.
What tools do I need for hanging my frames?
You’ll need nails or adhesive strips, a level, and possibly a tape measure for spacing out your frames accurately.