Gardening continues to evolve with the incorporation of innovative techniques designed to maximize space, efficiency, and yield. Among these methods, vertical gardening has taken center stage, particularly for those with limited space or for urban gardeners. One creative approach is using cattle panels to construct a vertical garden for growing squash. This article will guide you through the process of setting up a vertical garden using cattle panels while also discussing the benefits, care tips, and varieties of squash suitable for vertical growth.
Understanding Vertical Gardening
Benefits of Vertical Gardening
-
Space Efficiency: Vertical gardening allows gardeners to utilize vertical space, making it ideal for small yards, patios, or urban environments.
-
Improved Airflow: By growing plants vertically, you improve air circulation, thereby reducing the risk of diseases and pests.
-
Easier Harvesting: Harvesting becomes more straightforward when plants are elevated, reducing the need to bend or kneel.
-
Aesthetic Appeal: Vertical gardens can add beauty and interest to an outdoor space, acting as a living wall.
-
Soil Management: With vertically grown plants, there’s typically less soil disturbance, allowing the soil to maintain its structure better.
Why Use Cattle Panels?
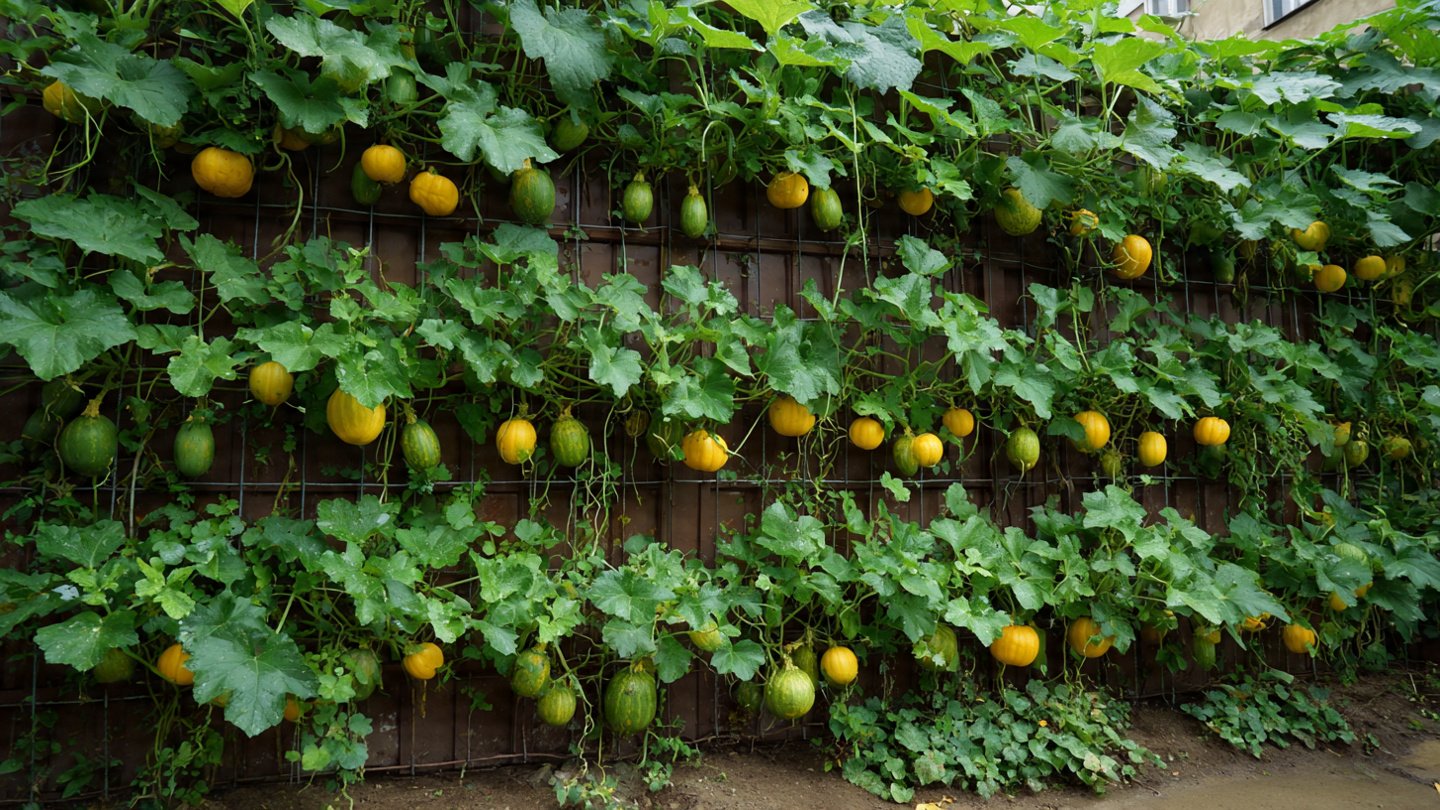
Cattle panels are wire fencing structures commonly used in pasture management. Their durability, versatility, and strength make them an excellent choice for vertical gardening. Using cattle panels for squash introduces a sturdy framework for climbing, which helps support the weight of the squash as they grow, while also securing them away from ground pests.
Tools and Materials Needed
Before diving into the construction of your vertical garden, gather the following tools and materials:
Materials
-
Cattle Panels: 16-foot by 50-inch panels are a popular choice.
-
Posts: Heavy-duty wood or metal posts to anchor the panels; the number will depend on your set-up and size.
-
Wire or Zip Ties: For attaching the panel to the posts.
-
Trellising Material: Optional but can include twine or netting for added support.
-
Soil: Quality potting mix for your containers or raised beds.
-
Planters or Raised Beds: To hold your soil and manage drainage effectively.
-
Nutrients: Organic fertilizer to promote healthy growth.
Tools
-
Post Hole Digger: For installing your posts.
-
Wire Cutters: To trim any excess wire on the cattle panels.
-
Gardening Gloves: To protect your hands.
-
Shovel: For moving soil and setting up your garden.
-
Measuring Tape: To ensure accurate placement.
Step-by-Step Guide to Create Your Vertical Garden
Step 1: Location Selection
Choose a sunny location that receives at least 6-8 hours of sunlight per day. Squash plants thrive in full sun, so positioning your vertical garden strategically is essential. Ensure that the area has adequate drainage and avoid flooding spots.
Step 2: Preparing the Soil
Next, prepare your soil mix. A good blend typically includes compost, peat moss, and perlite or vermiculite for aeration. This will create a nutrient-rich environment for your squash plants.
Step 3: Installing the Cattle Panels
-
Mark Your Area: Use a measuring tape to define the space where you plan to install the cattle panels.
-
Position the Posts: Dig holes for your posts, creating a row aligned with the edge of where you want your panels to stand. Space the posts about 6 to 8 feet apart for stability.
-
Install the Posts: Secure your posts into the ground, ensuring they are upright and stable. Use concrete for added reinforcement if necessary.
-
Attach the Cattle Panel: Hold the cattle panel against the posts and secure it using wire or zip ties, making sure it is taut and flat against the posts. The panel should be upright, creating a wall on which your squash can climb.
Step 4: Setting Up Your Planters
Position your planters at the base of the cattle panel. Ensure they are stable and filled with the prepared soil mix. Depending on your design, you can have a single row or multiple rows of planters.
Step 5: Planting Your Squash
Select squash varieties that are known for their climbing abilities, such as:
-
Butternut Squash: Known for its sweet flesh, it grows wonderfully vertically.
-
Zucchini: Fast-growing and prolific, zucchini can climb well with the right support.
-
Acorn Squash: Easily trained to climb and produces beautiful fruits.
-
Planting Seeds or Seedlings: Follow the recommended planting depth for squash, usually about 1 inch deep for seeds. If using seedlings, transplant them gently into the soil, keeping the roots intact.
-
Watering: Water your newly planted squash thoroughly but ensure the soil drains well.
Step 6: Supporting Growth
As your squash plants grow, they will need support to climb the cattle panels effectively.
-
Training the Vines: As the vines start to elongate, gently wrap them around the panel. Use twine or netting to assist their growth towards the panel if necessary.
-
Using Trellising Material: You can also attach small sections of netting to the panel, giving the squash more grip as they climb.
Care and Maintenance
Regular Watering
Squash plants need consistent moisture, especially during flowering and fruit-setting stages. Aim for 1 to 2 inches of water per week, adjusting based on rainfall.
Fertilizing
Incorporate organic fertilizer into the soil at planting and reapply every month to replenish nutrients. Look for options high in potassium, which is beneficial for fruiting plants.
Pest and Disease Control
Keep an eye out for common pests such as squash bugs and aphids. You can use organic pesticides or natural pest deterrents like neem oil. Rotating crops yearly and ensuring proper spacing can help deter diseases.
Pruning
Regularly check your squash plants and prune any dead or diseased leaves. This promotes better airflow and reduces the risk of disease. If the plants become too bushy, trim the vines to ensure they climb properly.
Harvesting Your Squash
The harvesting period will depend on the variety of squash planted. Zucchini is typically ready for harvest within 50-70 days, while butternut and acorn squash can take 80-100 days.
-
Signs of Ripeness: Look for firm, colorful fruits. They should be free from visible blemishes.
-
Cutting the Fruits: Use a sharp knife or pruning shears to cut the squash from the vine, leaving a small stem attached to prevent rot.
Additional Tips for Success
-
Rotate Your Crops: Avoid planting the same type of squash in the same spot each year to minimize pest issues.
-
Companion Planting: Consider planting companion plants like marigolds or basil at the base of your squash for natural pest control.
-
Use Companion Crops: Planting squash with legumes can enhance nitrogen levels in the soil, promoting healthier plants.
-
Integrate Cover Crops: If you plan to take a break from planting in the fall, consider using cover crops to improve soil health during the off-season.
Conclusion
Creating a vertical garden of squash using cattle panels is a fantastic and efficient way to maximize space, reduce pest problems, and enjoy a bountiful harvest. By following the steps outlined above and taking care to provide proper support, nutrients, and maintenance, you can create a thriving environment for your squash plants to flourish. Not only will you enhance your gardening experience, but you’ll also have the joy of summery squash dishes right at your fingertips. Happy gardening!