Introduction
Plastic pollution is one of the most urgent environmental challenges of our time. Every year, millions of plastic bottles end up in landfills, rivers, and oceans, taking centuries to decompose. Amid this crisis, creative upcycling projects are emerging as practical and visually appealing solutions. One such innovation is casting cement pots from plastic bottles — a simple, eco-friendly DIY project that transforms waste into functional home decor.
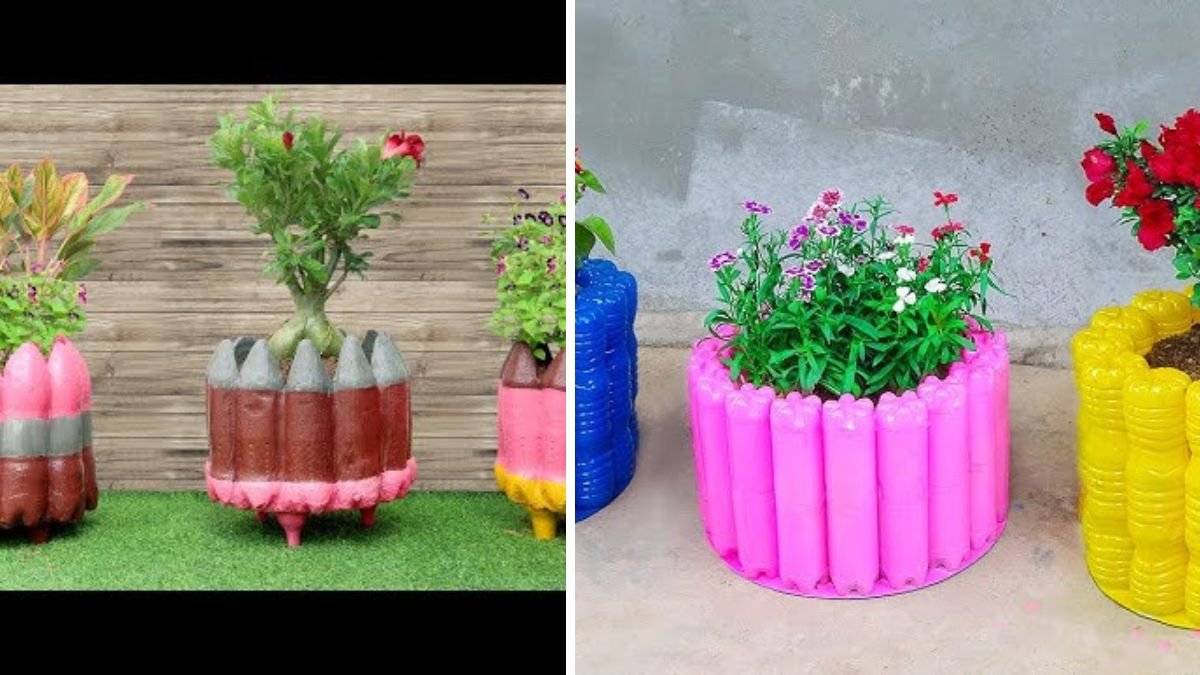
This method allows gardeners, crafters, and DIY enthusiasts to create durable, customizable plant pots while actively reducing plastic waste. Using plastic bottles as molds for cement pots is not only cost-effective but also promotes sustainable practices, aligning perfectly with the principles of [FOCUS KEYWORD].
Why Plastic Bottle Casting Matters
Tackling Plastic Waste
Plastic bottles, particularly single-use PET bottles, are a major contributor to environmental pollution. Left unrecycled, they can take hundreds of years to break down, releasing toxins into soil and water. Turning bottles into molds for cement pots is a simple form of upcycling that gives plastic a new purpose and prevents it from entering the waste stream.
Eco-Friendly Home Gardening
Creating cement pots from recycled bottles contributes to sustainable home gardening. Instead of purchasing new planters made from plastic or non-recycled materials, you can make unique, sturdy pots at home. These pots can be used for indoor plants, balcony gardens, or even small outdoor planters.
Creativity and Customization
DIY casting allows you to experiment with textures, shapes, and sizes. You can paint the pots, add textured designs, or embed small decorative items in the cement. Using plastic bottles as molds ensures a smooth inner surface and consistent shape, while still allowing room for creativity on the exterior.
Materials Needed for the Project
To create cement pots from plastic bottles, gather the following materials:
- Plastic bottles: Different sizes for varied pot designs
- Cement mix: Ordinary Portland cement or ready-to-use concrete mix
- Sand & water: To achieve the correct concrete consistency
- Reinforcement (optional): Small gravel or mesh for added strength
- Release agent: Cooking oil or mold release spray to make demolding easier
- Safety gear: Gloves, dust mask, and eye protection
With these basic materials, even beginners can start experimenting with [FOCUS KEYWORD] to create functional and aesthetic cement pots.
Step-by-Step Guide to Casting Cement Pots
Step 1: Prepare the Bottle Molds
Start by cutting the plastic bottles according to your desired pot size. For small pots, you can use the entire bottle; for larger pots, cut the bottle in half or remove the bottom. Apply a release agent such as cooking oil inside the mold to prevent the cement from sticking.
Step 2: Mix the Cement
In a mixing container, combine cement, sand, and water to form a thick but pourable mixture. Avoid making it too runny, as this can cause weak spots in your pot. For added strength, you can mix in small gravel or a bit of mesh reinforcement.
Step 3: Pour the Cement
Slowly pour the cement mixture into the prepared bottle molds. Tap the sides of the bottles gently to release trapped air bubbles, which can create cracks or uneven surfaces. Make sure the cement fills the mold evenly.
Step 4: Curing
Allow the cement to cure fully. This process typically takes 48–72 hours depending on the thickness of the pot and humidity levels. Ensure the pots are kept in a dry, shaded area while curing.
Step 5: Demolding
Once the cement is fully cured, carefully remove the plastic bottle molds. Thin plastic bottles can be cut away, while sturdier bottles may need to be gently peeled or sliced to release the cement pots. Your new DIY cement pots are now ready for planting or decorative use.
Tips for Successful Cement Casting
- Use thicker bottles for larger pots to prevent bending or warping under cement weight.
- Prevent air pockets by tapping or gently vibrating the mold after pouring cement.
- Experiment with textures by embedding small stones, glass pieces, or dyes into the cement.
- Consider reinforcement for bigger pots by adding a small mesh or gravel to the mix.
- Cure properly: Avoid rushing the process; fully cured cement ensures durability and longevity.
These simple practices can dramatically improve the quality and aesthetic appeal of your cement pots.
Creative Design Ideas
Minimalist Concrete Finish
Leave the pots plain for a modern, industrial look. Smooth the exterior with sandpaper once cured for a polished effect.
Painted Patterns
Once fully cured, paint geometric patterns or colorful designs to match your home decor. Acrylic paint works well on cement surfaces.
Embedded Decorations
Add small stones, shells, or glass pieces to the cement before it fully sets. This adds texture and visual interest to your pots.
Multi-Pot Structures
By stacking or connecting multiple bottle molds, you can create tiered planters or vertical garden arrangements — perfect for small balconies or patios.
Real-World Applications and Examples
Many DIY enthusiasts and sustainability advocates have showcased this technique online. Videos and blogs demonstrate how to upcycle plastic bottles into bonsai pots, herb planters, and decorative cement containers, providing practical inspiration for beginners.
Platforms like Pinterest, YouTube, and eco-crafting blogs feature projects showing:
- Using different bottle sizes to make nested pots
- Combining cement with recycled materials like glass and gravel for aesthetic effects
- Creating eco-friendly gifts and home decor items from recycled plastics
This hands-on approach encourages both sustainability and creativity, making it accessible to families, schools, and community projects.
Sustainability Impact
While the DIY casting of plastic bottles into cement pots is a small-scale solution, it contributes to a larger movement of responsible consumption and waste reduction. Projects like this:
- Promote the circular economy by reusing materials
- Reduce the volume of plastic entering landfills and oceans
- Educate communities on sustainable practices
- Inspire creativity and innovation in everyday eco-friendly projects
Academic research and case studies also support the use of recycled plastic in building materials and planters, demonstrating that small-scale DIY projects have measurable environmental benefits. (link.springer.com)
Authoritative Sources and References
- Springer – SN Applied Sciences: Research on recycling plastics into functional products (link.springer.com)
- Quikrete DIY Guides: Tutorials for home cement casting (quikrete.com)
- Eco-crafting Blogs: Step-by-step demonstrations on cement casting using recycled bottles
- Pinterest/YouTube Communities: Creative projects and design inspiration
These sources provide practical guidance, safety tips, and design ideas to make your cement casting project successful.
Conclusion
Casting cement pots from plastic bottles is a simple, eco-friendly DIY project that combines sustainability with creativity. Not only does it help reduce plastic waste, but it also allows you to make functional and aesthetically pleasing plant containers for your home or garden. With a few basic materials, proper technique, and patience, anyone can start experimenting with [FOCUS KEYWORD] and contribute to a greener, more sustainable lifestyle.
By turning discarded plastic bottles into stylish cement pots, you’re not only crafting unique home decor but also participating in an upcycling movement that benefits the environment, your community, and your personal creativity.