Hibiscus plants are beloved for their stunning flowers and lush foliage. Propagating hibiscus from cuttings is a rewarding way to expand your garden organically, save money, and preserve favorite varieties. With the right techniques, patience, and natural care, you can create healthy new plants that will bloom beautifully.
This guide provides a step-by-step organic approach to propagating hibiscus from cuttings, ensuring strong roots and vibrant growth.
Why Propagate Hibiscus From Cuttings
- Maintains the exact characteristics of the parent plant
- Faster than growing from seed
- Cost-effective and sustainable
- Fun and educational for gardeners of all levels
Hibiscus cuttings are generally taken from semi-hardwood branches, which root more reliably than older woody stems.
Selecting the Right Cuttings
- Timing: Late spring to early summer is ideal.
- Stem selection: Choose healthy, disease-free semi-hardwood stems (current season’s growth that is firm but not fully woody).
- Length: 4–6 inches long, with at least 2–3 nodes (leaf joints).
- Leaves: Remove lower leaves, leaving 2–3 at the top.
Healthy cuttings increase the success rate dramatically.
Preparing the Cuttings
- Trim the cutting: Make a clean cut just below a node.
- Optional rooting hormone: Dip the cut end in organic rooting hormone like willow extract or powdered hormone.
- Avoid overhandling: Excess touching can damage delicate tissue.
Choosing a Propagation Medium
Hibiscus cuttings root best in well-draining media:
- Peat and perlite mix: 50:50 ratio
- Coconut coir: Moist, retains air well
- Sand and compost: 1:1 ratio
Avoid dense garden soil; it may retain too much water and cause rot.
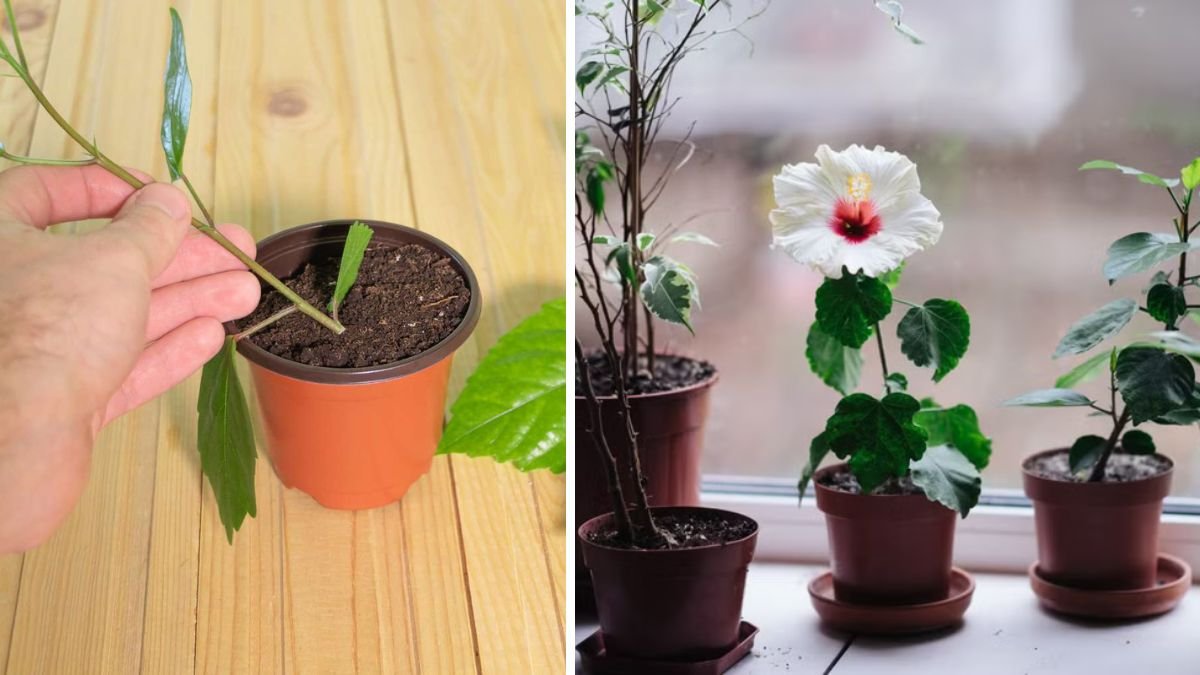
Planting the Cuttings
- Insert cutting 1–2 inches deep into prepared medium.
- Firm the soil gently around the stem.
- Water lightly to settle soil.
- Place in a warm, shaded location with indirect light.
Maintaining Humidity
High humidity promotes rooting:
- Cover cuttings with a clear plastic bag or mini greenhouse
- Mist lightly every 2–3 days
- Remove covering gradually as roots develop
Maintaining humidity prevents leaf loss and supports root formation.
Watering and Care
- Keep medium moist but not soggy
- Avoid overwatering, which causes rot
- Once roots form (usually 4–6 weeks), reduce humidity gradually
- Fertilize lightly with organic fertilizer once leaves appear
Transplanting Rooted Hibiscus
- Carefully remove cuttings with roots intact.
- Plant in larger pots or directly in the garden.
- Provide bright, indirect light initially, then gradually increase sun exposure.
- Water well and mulch around the base.
Organic Tips for Successful Hibiscus Propagation
- Use clean, sterilized tools to prevent disease
- Select strong parent plants free from pests
- Provide warm, consistent temperatures for rooting
- Avoid synthetic chemicals; organic rooting agents and fertilizers promote healthy growth
Troubleshooting Common Issues
- Wilting leaves: Too much direct sunlight or low humidity
- Yellow leaves: Overwatering or nutrient deficiency
- Cuttings failing to root: Use fresher stems, improve humidity, or try different rooting medium
Patience and observation are key—hibiscus cuttings take time to establish strong roots.
Final Thoughts
Propagating hibiscus from cuttings is a rewarding, organic method to expand your garden while maintaining your favorite varieties. With proper selection, care, and attention to humidity and watering, your new hibiscus plants will flourish, offering vibrant flowers and lush greenery. This technique not only saves money but also deepens your connection with your plants, giving you the satisfaction of nurturing life from stem to bloom.