Garlic (Allium sativum) is a staple in kitchens worldwide, renowned not only for its distinct flavor but also for its amazing health benefits. Many gardeners and culinary enthusiasts dream of growing massive garlic bulbs—the size of a fist—maximizing both yield and nutritional value. In this extensive guide, we will explore the fundamental principles, practices, and secrets that can lead to the successful culturing of big garlic bulbs, detailing everything from soil preparation to harvesting techniques.
Understanding Garlic Varieties
Softneck vs. Hardneck
Garlic is primarily divided into two main categories: softneck and hardneck. Softneck varieties are known for their higher yield and longer shelf life, making them a favorite among commercial growers. They are typically the types you find in grocery stores. Hardneck varieties, on the other hand, tend to produce larger bulbs with a more robust flavor, making them ideal for home gardens.
Popular Varieties for Giant Bulbs:
- elephant garlic: Though technically a type of leek, it produces large cloves and a milder flavor.
- Italian Purple: This hardneck variety is famous for its rich flavor and large bulb size.
- Music: Known for its cold hardiness and robust flavor, this variety yields sizeable bulbs.
Selecting Quality Seed Garlic
One of the fundamental steps to achieving fist-sized garlic bulbs is starting with high-quality seed garlic. Avoid using store-bought garlic, as these bulbs may be treated with growth inhibitors or diseases.
Where to Source Seed Garlic:
- Local Farms: Visiting local farmers’ markets can yield fresh and locally adapted varieties.
- Specialized Agricultural Stores: Retailers who specialize in garlic will typically have a range of premium seed types.
- Online Nurseries: Many reputable online stores focus on heirloom and disease-free seed garlic.
Spotting Healthy Seed Garlic
When selecting bulbs, look for:
- Size: Choose the largest cloves for planting; bigger cloves typically produce larger bulbs.
- Firmness: The cloves should be tight and firm without any soft spots or blemishes.
- Skin Quality: Bulbs should have unbroken and intact outer layers, indicating good health.
Soil Preparation
Soil Type and Composition
Garlic thrives in well-drained, fertile soil. The ideal soil type is loamy with a balanced mixture of sand, silt, and clay. You’ll want to ensure your soil has a pH between 6.0 and 7.0, as garlic prefers slightly acidic to neutral soil.
Improving Soil Fertility
Prior to planting, it’s crucial to enrich your soil. Consider the following amendments:
- Organic Matter: Incorporate compost or well-rotted manure to provide nutrients and improve soil structure.
- Bone Meal: Adding bone meal can provide phosphorus, vital for root development and bulb formation.
- Kelp Meal: This provides micro-nutrients and stimulates robust growth.
Soil Testing
Conduct a soil test to identify any existing nutrient deficiencies and adjust accordingly. Testing kits are available at local gardening stores or through agricultural extension services.
Planting Techniques
Timing the Planting
The ideal time to plant garlic is generally in the fall, about four to six weeks before the ground freezes. In most areas, this translates to late September through October. In warmer climates, consider planting in late winter or early spring.
Planting Strategy
- Spacing: Garlic bulbs should be planted 6-8 inches apart in rows spaced 12-18 inches apart. This spacing ensures good air circulation and minimizes disease risks.
- Depth: Plant cloves 2-3 inches deep, with the pointed side facing upward.
Mulching
After planting, apply a layer of organic mulch (straw, wood chips, or leaves) about 2-4 inches thick. Mulching helps retain moisture, suppress weeds, and moderate soil temperature.
Watering Practices
Understanding Garlic’s Water Needs
Garlic requires consistent moisture, especially during the initial growing phase and bulbing stage. However, it’s vital to avoid over-watering, as garlic is susceptible to root rot.
Best Practices for Watering
- Drip Irrigation: A drip system can help deliver water directly to the roots while preventing fungal diseases that arise from wet foliage.
- Deep, Infrequent Watering: Aim for 1-2 inches of water per week, adjusting for rainfall. Deep watering encourages deep root growth, essential for larger bulbs.
Fertilization Tips
Nutrient Needs at Different Stages
Garlic has different nutritional needs at various growth stages:
- Early Growth: A high nitrogen fertilizer (such as a fish emulsion or a high-nitrogen organic blend) can promote healthy leaf growth.
- Mid-Season: Switch to a balanced fertilizer as the plants mature, enriching with phosphorus and potassium.
- Pre-Harvest: Avoid nitrogen-rich fertilizers; instead, use a low-nitrogen fertilizer or just organic matter to allow bulbs to mature properly.
Organic Fertilizers
Choose organic options such as:
- Blood Meal: High in nitrogen, aiding initial growth.
- Fish Emulsion: A balanced source of essential nutrients.
- Compost Tea: A rich source of nutrients that also encourages beneficial microbial activity in the soil.
Pest and Disease Management
Common Garlic Pests
- Garlic Bloat Nematode: These microscopic pests can ruin bulb development.
- Onion Maggot: These pests can also target garlic; watch for leaf wilting and yellowing.
Prevention Techniques:
- Crop rotation: Avoid planting garlic in the same area year after year.
- Companion plants: Certain plants, like marigolds, can deter pests.
Diseases to Watch For
- White Rot: A soil-borne fungal disease that can devastate garlic crops. Avoid overhead watering to reduce humidity.
- Downy Mildew: Regular monitoring and prompt removal of affected leaves can help manage this disease.
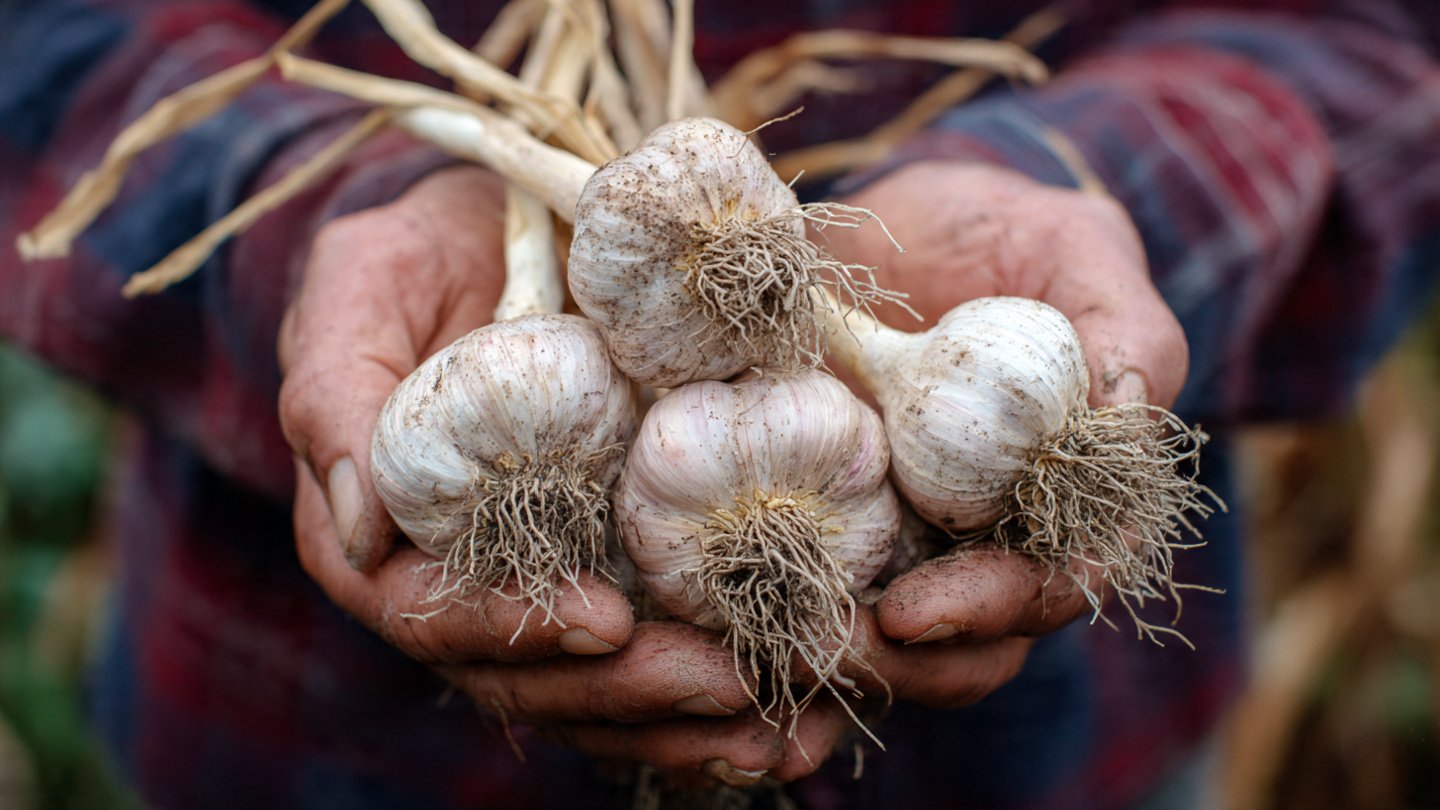
Harvesting Giant Garlic Bulbs
When to Harvest
Typically, garlic is ready to harvest when the bottom leaves turn brown, but the top leaves remain partially green. This usually occurs around late June to early July.
Harvesting Technique
- Gently loosen the soil around the bulbs using a garden fork, being careful not to puncture them.
- Grasp the stalk and lift the bulbs out of the ground carefully.
Curing Garlic
After harvesting, garlic needs to be cured for several weeks in a dry, dark, and well-ventilated area. This process improves flavor and storage quality.
- Hanging Bunches: Hang garlic in bunches or lay them flat in a single layer on a wire rack.
- Optimal Conditions: Ideal curing conditions are around 70% humidity and temperatures between 65-75°F.
Storing Garlic
After curing, trim garlic stems and roots before storing. Store in a cool, dry place, preferably in a mesh bag or box to allow airflow.
Conclusion
Growing garlic bulbs the size of a fist requires attention to detail, from choosing the right variety and preparing the soil to mastering watering and pest management practices. By implementing these strategies and being proactive in your gardening efforts, you can maximize your garlic yields and harvest impressive bulbs that truly stand out.
Whether for culinary endeavors or a personal gardening challenge, successfully growing massive garlic is not just satisfying but can also contribute to a healthy diet. So, start preparing now, and before you know it, you’ll be harvesting garlic that exceeds expectations!
Additional Resources
- Books: Look for books specifically on garlic cultivation for deeper insights.
- Local Extension Offices: These can provide information tailored to your specific region’s growing conditions.
With patience and diligence, your garden can yield impressive garlic bulbs that add both flavor and health benefits to your meals!